> ## Documentation Index
> Fetch the complete documentation index at: https://docs.agrihub360.com/llms.txt
> Use this file to discover all available pages before exploring further.
# Switch the Layers
> Show or hide fields, stores, water, herds and sensors, and switch between the street map, the satellite and the vegetation tile.
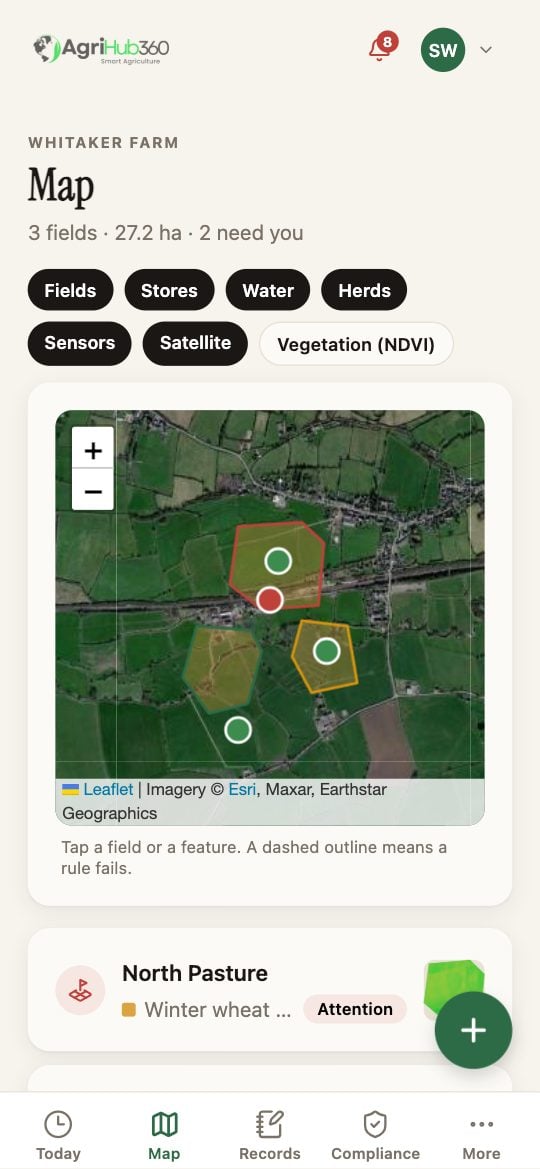
There is a row of chips above the map, and a solid chip is one that is on. **Fields**, **Stores**, **Water**, **Herds** and **Sensors** show and hide what you have drawn and placed.
**Satellite** swaps the streets for the imagery; the fields sit on their real ground. **Vegetation (NDVI)** lays the latest capture over each field, greener where the canopy is stronger.
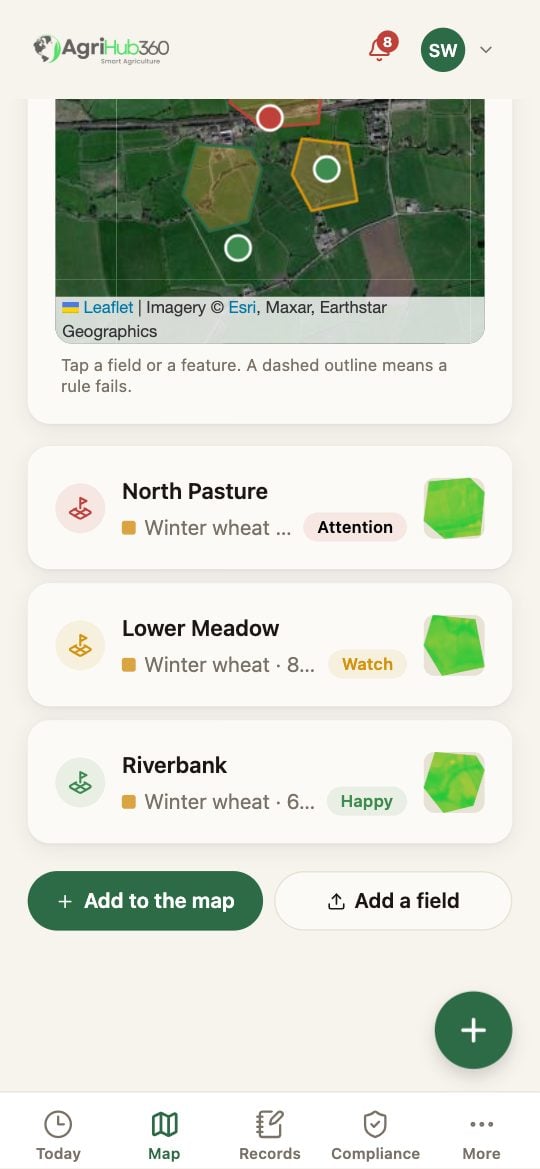
Under the map there is one row per field. It shows the crop in its colour, the hectares and anything that needs you, with the field's cover photo or its NDVI tile on the right. Tap the row to open the field.
 ## What You See Next
The chips are remembered. A dashed outline on the map means a siting rule fails on that feature; tap it to read which.
## If It Does Not
| You see | It means | Do |
| ------------------------------------- | ----------------------------- | ----------------------------------- |
| Vegetation shows nothing | No capture yet for the field | It arrives with the next clear pass |
| The map is grey | The tiles have not loaded | Pull to refresh; check the signal |
| A sensor pin is at the field's centre | The probe has not been placed | Place a Probe on the Field |
Related: [Place a Probe on the Field](/how-do-i/map/place-a-probe-on-the-field), [Satellite NDVI](/features/field-monitoring/satellite-ndvi), [Field Map First](/features/field-monitoring/field-map-first).
## What You See Next
The chips are remembered. A dashed outline on the map means a siting rule fails on that feature; tap it to read which.
## If It Does Not
| You see | It means | Do |
| ------------------------------------- | ----------------------------- | ----------------------------------- |
| Vegetation shows nothing | No capture yet for the field | It arrives with the next clear pass |
| The map is grey | The tiles have not loaded | Pull to refresh; check the signal |
| A sensor pin is at the field's centre | The probe has not been placed | Place a Probe on the Field |
Related: [Place a Probe on the Field](/how-do-i/map/place-a-probe-on-the-field), [Satellite NDVI](/features/field-monitoring/satellite-ndvi), [Field Map First](/features/field-monitoring/field-map-first).